
Hey there! As a butterfly valve supplier, I've seen my fair share of dirty and grimy valves. Cleaning a butterfly valve is super important to keep it working well and make it last longer. In this blog, I'll walk you through how to clean a butterfly valve step by step.
First off, let's talk about why cleaning a butterfly valve is a big deal. Over time, all sorts of stuff can build up inside the valve, like dirt, debris, and even corrosion. This buildup can mess with the valve's performance, making it less efficient and increasing the risk of leaks. Regular cleaning helps prevent these problems and keeps your valve in tip - top shape.
Before you start cleaning, you need to gather the right tools. You'll need a few basic things like a soft brush, a clean cloth, a mild detergent, and some lubricant. Make sure you also have safety gear like gloves and goggles, especially if you're dealing with a valve that has been in a harsh environment.
The first step is to shut down the system. This is crucial for your safety. You don't want the valve to be operating while you're cleaning it. Once the system is off, isolate the valve by closing the upstream and downstream isolation valves. This will prevent any fluid from flowing through the valve during the cleaning process.
Next, remove the valve from the pipeline. This might sound a bit tricky, but if you've got the right tools and follow the manufacturer's instructions, it should be okay. Some valves are easier to remove than others, but generally, you'll need to loosen the bolts or nuts that hold the valve in place.
Now, it's time to give the valve a good visual inspection. Look for any signs of damage, like cracks or excessive wear. If you notice any serious issues, it might be time to replace the valve. But if it just looks dirty, you can proceed with the cleaning.
Start by using the soft brush to gently remove any loose dirt and debris from the valve's surface. Be careful not to scratch the valve, especially if it's a soft seat butterfly valve. The soft seat can be easily damaged. After brushing, use the clean cloth to wipe away the loosened dirt.
For more stubborn dirt and grime, you can use a mild detergent. Mix the detergent with water according to the instructions on the label. Dip the cloth or brush into the soapy solution and carefully clean the valve. Make sure to get into all the nooks and crannies, including the disc, seat, and body of the valve.
Once you've cleaned the valve with the soapy solution, rinse it thoroughly with clean water. You want to make sure all the detergent is removed, as any residue could cause problems later on. After rinsing, dry the valve completely using a clean, dry cloth.
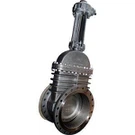
Now, let's talk about the seat. The seat is a critical part of the valve, and it needs special attention. If it's a Metal To Metal Butterfly Valve, you can use a fine - grit sandpaper to gently smooth out any rough spots on the seat. But be very careful not to overdo it, as you don't want to change the shape of the seat.
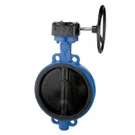
If it's a soft seat, you can use a soft brush to clean it. Avoid using any abrasive materials that could damage the seat. After cleaning the seat, check it for any signs of wear or damage. If the seat is worn out, it might need to be replaced.
After cleaning the valve and the seat, it's time to lubricate the moving parts. Use a lubricant that is compatible with the valve materials. Apply the lubricant to the stem, bearings, and other moving parts. This will help the valve operate smoothly and reduce friction.


Once you've lubricated the valve, it's time to reinstall it in the pipeline. Make sure to align the valve correctly and tighten the bolts or nuts to the recommended torque. This is important to ensure a proper seal and prevent leaks.
After reinstalling the valve, open the upstream and downstream isolation valves slowly. Check for any leaks around the valve. If you notice any leaks, you might need to tighten the bolts a bit more or check the gasket.
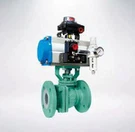
Now, let's talk about different types of butterfly valves and any special cleaning considerations. For a High Performance Butterfly Valve, it's even more important to follow the manufacturer's cleaning instructions. These valves are designed for more demanding applications, and improper cleaning could affect their performance.
Some high - performance valves might have special coatings or materials that require specific cleaning agents. Always refer to the valve's manual to make sure you're using the right products.
In addition to regular cleaning, it's also a good idea to perform periodic maintenance on your butterfly valves. This could include checking the alignment, adjusting the packing, and inspecting the actuator if the valve is automated.
Cleaning a butterfly valve is not that hard if you follow the right steps. By keeping your valves clean and well - maintained, you can ensure they operate efficiently and have a long service life.
If you're in the market for butterfly valves or need more advice on valve maintenance, don't hesitate to reach out. We're here to help you find the right valve for your application and keep it in great condition. Whether you need a soft seat butterfly valve, a Metal To Metal Butterfly Valve, or a High Performance Butterfly Valve, we've got you covered.
References:
- Manufacturer's manuals for butterfly valves
- Industry standards for valve maintenance and cleaning