
Hey there! I'm a supplier of Diaphragm Valves, and today I wanna chat about how to retrofit an existing system with a Diaphragm Valve. It's a process that can bring a whole bunch of benefits to your system, so let's dive right in.
Why Retrofit with a Diaphragm Valve?
First off, you might be wondering why you should even consider retrofitting your existing system with a Diaphragm Valve. Well, there are several good reasons. Diaphragm Valves are known for their excellent sealing capabilities. They can prevent leaks, which is super important, especially when dealing with hazardous or expensive fluids.
Another great thing about Diaphragm Valves is their resistance to corrosion. If your system is handling corrosive substances, a Diaphragm Valve can last much longer than other types of valves. This means less maintenance and replacement costs in the long run.
They're also easy to operate. Whether you need to control the flow of a fluid precisely or just turn it on and off, Diaphragm Valves can do the job with relative ease.
Types of Diaphragm Valves
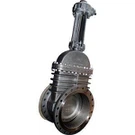
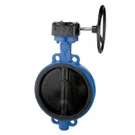
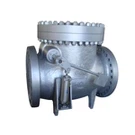
Before we get into the retrofit process, let's quickly talk about the different types of Diaphragm Valves available. There are mainly two types: the Weir Type Diaphragm Valve and the Straight Type Diaphragm Valve.


The Weir Type Diaphragm Valve has a weir or a raised ridge in the valve body. This design allows for better shut - off and is great for applications where you need to completely stop the flow. It's commonly used in industries like chemical processing and water treatment.
On the other hand, the Straight Type Diaphragm Valve has a straight - through passage. This type offers less resistance to flow, which is ideal for applications where you need a high flow rate. It's often used in food and beverage industries.
There's also the Pneumatic Teflon lined diaphragm valve. This valve uses compressed air to operate and has a Teflon lining, which provides excellent chemical resistance. It's suitable for applications where you're dealing with highly corrosive chemicals.
Assessing Your Existing System
The first step in retrofitting your system with a Diaphragm Valve is to assess your existing system. You need to know the specifications of your current setup, such as the size of the pipes, the type of fluid being handled, the pressure and temperature conditions, and the flow rate requirements.
Measure the pipe diameter accurately. This is crucial because you need to choose a Diaphragm Valve that fits properly. You don't want a valve that's too big or too small, as it can lead to leaks or inefficient operation.
Analyze the fluid. Is it corrosive, abrasive, or viscous? This will help you determine the material of the valve body and the diaphragm. For example, if you're dealing with a highly corrosive fluid, you might want to choose a valve with a Teflon lining or a corrosion - resistant diaphragm material.
Check the pressure and temperature. Diaphragm Valves have specific pressure and temperature ratings. Make sure the valve you choose can handle the conditions in your system. If the pressure is too high or the temperature is too extreme, the valve might not work properly or could even get damaged.
Selecting the Right Diaphragm Valve
Once you've assessed your system, it's time to select the right Diaphragm Valve. Consider the type of valve based on your application. As I mentioned earlier, if you need a good shut - off, the Weir Type Diaphragm Valve might be a good choice. If you need a high flow rate, go for the Straight Type Diaphragm Valve.
Think about the material. The valve body can be made of different materials like cast iron, stainless steel, or plastic. The diaphragm can be made of rubber, Teflon, or other elastomers. Choose materials that are compatible with the fluid in your system.
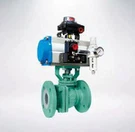
Also, consider the operation method. Diaphragm Valves can be operated manually, pneumatically, or electrically. Manual valves are simple and cost - effective for applications where you don't need frequent adjustments. Pneumatic valves are great for remote control and fast operation. Electric valves are suitable for applications where you need precise control and automation.
Preparing for the Retrofit
Before you start the actual retrofit, you need to prepare. Gather all the necessary tools, such as wrenches, pipe cutters, and sealants. Make sure you have the right size and type of gaskets and fittings.
Shut down the system and isolate the section where you'll be installing the Diaphragm Valve. This is important for safety reasons. Drain the fluid from the pipes to avoid spills and make the installation process easier.
Clean the pipes thoroughly. Remove any dirt, debris, or old sealant from the pipe ends. This will ensure a good seal between the valve and the pipes.
Installing the Diaphragm Valve
Now it's time to install the Diaphragm Valve. First, place the gaskets on the pipe ends. Make sure they're centered and properly seated.
Insert the valve between the pipes. Align the valve ports with the pipe openings. Use wrenches to tighten the bolts or nuts that connect the valve to the pipes. But be careful not to over - tighten, as this can damage the gaskets or the valve body.
Connect the actuator (if it's a pneumatic or electric valve). Follow the manufacturer's instructions for wiring or connecting the air supply. Make sure all the connections are secure.
Testing the System
After the installation is complete, it's crucial to test the system. Slowly open the fluid supply and check for any leaks. Look for any signs of fluid seeping out around the valve connections or through the diaphragm.
Check the operation of the valve. If it's a manual valve, turn it on and off a few times to make sure it operates smoothly. If it's a pneumatic or electric valve, test the control system to ensure it can open and close the valve as expected.
Monitor the flow rate and pressure. Make sure they're within the desired range. If there are any issues, such as a drop in pressure or an abnormal flow rate, troubleshoot the problem. It could be due to a misaligned valve, a damaged gasket, or a problem with the actuator.
Maintenance and Care
Once the retrofit is successful and the system is up and running, don't forget about maintenance. Regularly inspect the Diaphragm Valve for any signs of wear and tear. Check the diaphragm for cracks or damage. Replace it if necessary.
Keep the valve clean. Remove any dirt or debris that might accumulate on the valve body or the actuator. Lubricate the moving parts (if applicable) according to the manufacturer's recommendations.
If you notice any problems, such as a leak or a malfunction, address them immediately. Ignoring small issues can lead to bigger problems down the road.
Conclusion
Retrofitting an existing system with a Diaphragm Valve can be a great way to improve the performance and reliability of your system. By following these steps, you can ensure a successful retrofit.
If you're interested in purchasing Diaphragm Valves for your retrofit project, I'd love to have a chat with you. We have a wide range of high - quality Diaphragm Valves to meet your needs. Just reach out to us, and we can discuss your requirements in detail.
References
- Valve Handbook, 4th Edition by J. S. Tuzson
- Chemical Engineering Handbook by Perry and Green
- Industrial Valves: Selection, Installation, and Maintenance by S. K. Som