
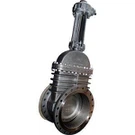
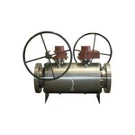
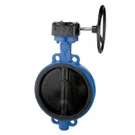
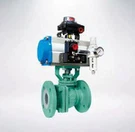
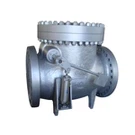
Hey there! I'm a supplier of Metal Seated Ball Valves, and today I'm gonna walk you through the process of replacing the seat of a metal seated ball valve. Whether you're a DIY enthusiast or a professional in the industry, this guide will help you get the job done right.
Why Replace the Seat?
First off, you might be wondering why you'd need to replace the seat of a metal seated ball valve. Well, over time, the seat can wear out due to constant friction, high pressure, or exposure to harsh chemicals. A worn-out seat can lead to leaks, reduced performance, and even system failures. So, replacing the seat is crucial to keep your valve working smoothly and efficiently.
Tools and Materials You'll Need
Before you start the replacement process, make sure you have the following tools and materials on hand:
- Wrenches: A set of wrenches to loosen and tighten the bolts.
- Screwdrivers: Both flathead and Phillips head screwdrivers may be needed.
- Sealant: A high-quality sealant to ensure a tight seal.
- New Seat: Make sure you have the correct replacement seat for your valve. You can find a wide range of Metal Seated Ball Valves and replacement parts on our website Metal Seated Ball Valve.
Step-by-Step Guide
Now, let's get into the actual replacement process. Follow these steps carefully to ensure a successful seat replacement:
Step 1: Shut Off the System
Before you start working on the valve, it's important to shut off the system to prevent any leaks or accidents. This may involve turning off the power, closing the main valve, or draining the system.
Step 2: Remove the Valve
Once the system is shut off, use your wrenches to remove the valve from the pipeline. Be careful not to damage the valve or the pipeline during this process.


Step 3: Disassemble the Valve
Next, disassemble the valve by removing the bolts and other components. This will give you access to the seat. Keep track of all the parts and their positions so you can reassemble the valve correctly later.
Step 4: Remove the Old Seat
Use your screwdrivers to remove the old seat from the valve. Be gentle to avoid damaging the valve body. If the seat is stuck, you may need to use a little bit of force or a specialized tool to remove it.
Step 5: Clean the Valve Body
Once the old seat is removed, clean the valve body thoroughly to remove any dirt, debris, or old sealant. This will ensure a good seal when you install the new seat.
Step 6: Install the New Seat
Apply a thin layer of sealant to the valve body and the new seat. Then, carefully place the new seat into the valve body and make sure it is properly seated. Use your screwdrivers to secure the seat in place.
Step 7: Reassemble the Valve
Now that the new seat is installed, it's time to reassemble the valve. Put all the components back in their original positions and tighten the bolts securely. Make sure everything is properly aligned and tightened to prevent any leaks.
Step 8: Install the Valve
Once the valve is reassembled, install it back into the pipeline. Use your wrenches to tighten the bolts and make sure the valve is securely attached.
Step 9: Test the Valve
After the valve is installed, turn on the system and test the valve to make sure it is working properly. Check for any leaks or other issues and make any necessary adjustments.
Tips and Tricks
Here are some additional tips and tricks to help you with the seat replacement process:
- Read the Manual: Before you start working on the valve, make sure you read the manufacturer's manual carefully. This will give you specific instructions and guidelines for your valve.
- Use the Right Tools: Using the right tools is crucial for a successful seat replacement. Make sure you have all the necessary tools and use them correctly.
- Be Careful: The seat replacement process can be dangerous, so it's important to be careful and follow all safety precautions. Wear protective gear such as gloves and safety glasses.
- Get Professional Help: If you're not comfortable working on the valve yourself, or if you're unsure about any part of the process, it's always a good idea to get professional help.
Conclusion
Replacing the seat of a metal seated ball valve may seem like a daunting task, but with the right tools, materials, and instructions, it can be done easily and safely. By following the steps outlined in this guide, you can ensure a successful seat replacement and keep your valve working smoothly for years to come.
If you have any questions or need further assistance, or if you're interested in purchasing a Metal Seated Ball Valve or replacement parts, please don't hesitate to contact us. We're here to help you with all your valve needs.
References
- Manufacturer's Manual for Metal Seated Ball Valves
- Industry Standards for Valve Maintenance and Repair