
How to Replace a Worn - out Check Valve?
A check valve is a crucial component in many piping systems, ensuring the unidirectional flow of fluids and preventing backflow. Over time, check valves can wear out due to continuous use, corrosion, or other factors. When this happens, replacing the worn - out check valve becomes necessary to maintain the efficiency and safety of the system. As a check valve supplier, I am here to guide you through the process of replacing a check valve.
Understanding Check Valves
Before we dive into the replacement process, it's essential to understand the different types of check valves. There are several common types, including the Swing Type Check Valve, Dual Plate Check Valve, and Damping Device check valve.
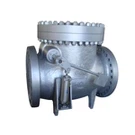
Swing type check valves have a disc that swings on a hinge. When the fluid flows in the correct direction, the disc is pushed open, allowing the fluid to pass. When the flow reverses, the disc swings back to its closed position, preventing backflow.
Dual plate check valves consist of two semicircular plates that are hinged at the center. They are compact and have a quick closing action, which makes them suitable for applications where rapid prevention of backflow is required.


Damping device check valves are designed with a damping mechanism to reduce water hammer and noise. They slow down the closing speed of the valve, which is beneficial in systems where sudden pressure changes can cause damage.
Tools and Materials Needed
- Adjustable Wrench: For loosening and tightening the nuts and bolts that connect the valve to the pipeline.
- Pipe Wrench: Useful for gripping and turning pipes, especially if they are securely connected to the valve.
- Sealant or Gasket: Depending on the type of valve and the pipeline, you may need a sealant or a gasket to ensure a leak - free connection.
- Measuring Tape: To measure the size of the existing valve and ensure that the replacement valve has the same dimensions.
- Replacement Check Valve: Select the appropriate type and size of the check valve based on your system's requirements.
Step - by - Step Guide to Replacing a Check Valve
Step 1: Shut Off the System
Before starting any work on the check valve, it's crucial to shut off the flow of fluid in the system. This may involve closing the main shut - off valve or isolating the section of the pipeline where the valve is located. Safety is of utmost importance, and make sure to relieve any pressure in the pipeline before proceeding.
Step 2: Drain the Pipeline
After shutting off the system, drain the fluid from the section of the pipeline where the check valve is installed. This can usually be done by opening a drain valve or using a pump to remove the remaining fluid. Draining the pipeline prevents spills and makes the replacement process easier.
Step 3: Remove the Old Check Valve
- Loosen the Connections: Use an adjustable wrench or a pipe wrench to loosen the nuts and bolts that connect the old check valve to the pipeline. If the connections are very tight, you may need to apply a penetrating oil to help loosen them.
- Remove the Valve: Once the connections are loose, carefully remove the old check valve from the pipeline. Be prepared for any remaining fluid that may drain out.
Step 4: Inspect the Pipeline
Before installing the new check valve, inspect the pipeline for any damage or debris. Clean the pipeline if necessary, removing any dirt, rust, or other contaminants that could affect the performance of the new valve.
Step 5: Install the New Check Valve
- Check the Orientation: Make sure the new check valve is installed in the correct orientation. Check valves are designed to allow flow in only one direction, and installing it backwards will result in improper functioning.
- Apply Sealant or Install Gasket: Apply a suitable sealant to the pipe ends or install a gasket between the valve and the pipeline, depending on the type of connection.
- Connect the Valve: Place the new check valve in position and tighten the nuts and bolts to connect it to the pipeline. Ensure that the connections are tight but not over - tightened, as this could damage the valve or the pipeline.
Step 6: Test the System
- Restore the Flow: Once the new check valve is installed, gradually restore the flow of fluid in the system. Check for any leaks at the valve connections.
- Monitor the System: Observe the system for a period of time to ensure that the check valve is functioning properly. Check for any unusual noises, vibrations, or pressure changes.
Troubleshooting
Leaks
If you notice leaks at the valve connections after installation, check the tightness of the nuts and bolts. If the leaks persist, you may need to re - apply the sealant or replace the gasket.
Improper Functioning
If the check valve is not closing properly or allowing backflow, double - check the orientation of the valve. It's possible that the valve was installed backwards. If the problem still exists, there may be an issue with the valve itself, and you may need to replace it with a new one.
Why Choose Our Check Valves?
As a check valve supplier, we offer high - quality check valves that are designed to meet the diverse needs of different industries. Our valves are made from premium materials, ensuring durability and reliability. We have a wide range of check valves, including swing type, dual plate, and damping device check valves, to provide you with the best solution for your specific application.
If you are experiencing problems with your current check valve or need to replace a worn - out one, don't hesitate to contact us for a consultation. We can help you select the right check valve for your system and provide you with all the support you need during the installation process. Whether you are in the water treatment, oil and gas, or chemical industry, we have the expertise and products to meet your requirements. Reach out to us to discuss your check valve needs and explore how our products can enhance the performance and safety of your piping systems.
References
- "Valve Handbook", edited by Chris Walas. This comprehensive handbook provides detailed information on different types of valves, including check valves, and their applications.
- "Piping and Pipeline Engineering: Design, Construction, Maintenance, and Integrity Management", by George A. Antaki. It offers in - depth knowledge about piping systems and the role of check valves within them.