

Hey there! As a supplier of Knife Gate Valves, I've seen firsthand how crucial proper alignment is during installation. A misaligned valve can lead to all sorts of problems, from leaks to premature wear and tear. In this blog, I'm gonna share some tips on how to ensure the proper alignment of a Knife Gate Valve during installation.
First off, let's talk about why alignment matters. A Knife Gate Valve is designed to cut through thick, viscous materials like slurry, sludge, and other industrial waste. When the valve is properly aligned, the gate can move smoothly up and down, creating a tight seal and preventing any leakage. But if the valve is misaligned, the gate may not close properly, leading to leaks and potential damage to the valve and the surrounding equipment.
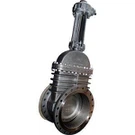
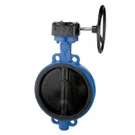
So, how do you ensure proper alignment? Well, the first step is to choose the right valve for the job. At our company, we offer a wide range of Knife Gate Valves, including Metal Seated Knife Gate Valve, Urethan knife gate valve, and Slurry Gate Valve. Each type of valve is designed for specific applications, so it's important to choose the one that best suits your needs.
Once you've chosen the right valve, the next step is to prepare the installation site. Make sure the pipeline is clean and free of any debris or obstructions. Check the flange faces for any damage or irregularities, and make sure they are flat and parallel. If the flange faces are not flat, you may need to use a gasket or shim to compensate for the unevenness.
Before installing the valve, it's a good idea to test fit it to make sure it fits properly. Place the valve between the flanges and align the bolt holes. Make sure the valve is centered and level, and that the gate can move freely up and down. If the valve doesn't fit properly, you may need to make some adjustments to the pipeline or the valve itself.
When installing the valve, it's important to use the right tools and techniques. Make sure you have the correct size and type of bolts, and tighten them evenly using a torque wrench. Over-tightening the bolts can damage the valve or the flanges, while under-tightening them can lead to leaks. Follow the manufacturer's instructions for tightening the bolts, and make sure you use the correct torque settings.
After installing the valve, it's important to check the alignment again. Use a level or a straightedge to make sure the valve is still centered and level. Check the gate to make sure it can move freely up and down, and that there are no signs of binding or resistance. If you notice any problems, make the necessary adjustments before putting the valve into service.
In addition to proper alignment, it's also important to maintain the valve regularly. Check the valve for any signs of wear or damage, and replace any worn or damaged parts as soon as possible. Lubricate the valve regularly to ensure smooth operation, and clean the valve to prevent the buildup of debris and contaminants.
To sum it up, proper alignment is essential for the proper operation of a Knife Gate Valve. By choosing the right valve, preparing the installation site, using the right tools and techniques, and maintaining the valve regularly, you can ensure that your valve will provide reliable service for years to come.


If you're in the market for a Knife Gate Valve, or if you have any questions about installation or maintenance, please don't hesitate to contact us. We're here to help you find the right valve for your needs, and to provide you with the support and expertise you need to ensure a successful installation.
References
- Manufacturer's installation and maintenance manuals for Knife Gate Valves
- Industry standards and best practices for valve installation and alignment