
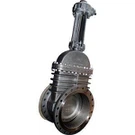
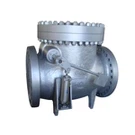
A dual plate check valve is a crucial component in many piping systems, designed to prevent the reverse flow of fluids. Over time, these valves can accumulate debris, sediment, and other contaminants, which can affect their performance and lifespan. Regular cleaning of a dual plate check valve is essential to ensure its proper functioning and to maintain the efficiency of the entire piping system. As a supplier of dual plate check valves, I am well - versed in the process of cleaning these valves, and I'd like to share some detailed steps and tips with you.
Step 1: Preparation
Before you start cleaning the dual plate check valve, it's important to take some preparatory steps. First, ensure that the system is shut down and depressurized. This is a safety measure to prevent any accidental release of fluid or pressure during the cleaning process. You should also wear appropriate personal protective equipment (PPE), such as safety glasses, gloves, and a protective suit, to protect yourself from any potential hazards.
Gather all the necessary tools and cleaning agents. You will typically need a set of wrenches to remove the valve from the pipeline, a brush (preferably a wire brush for stubborn deposits), a clean cloth, and a suitable cleaning solution. The cleaning solution should be chosen based on the type of contaminants present in the valve. For general dirt and sediment, a mild detergent mixed with water can be sufficient. However, for more stubborn deposits like rust or scale, a specialized descaling agent may be required.
Step 2: Valve Removal
Once the system is shut down and you have all the necessary tools, carefully remove the dual plate check valve from the pipeline. Use the appropriate wrenches to loosen the bolts or nuts that secure the valve to the flanges of the pipeline. Make sure to keep track of all the removed parts, such as bolts, gaskets, and washers, as they will need to be reinstalled correctly later.
After removing the valve, place it on a clean and stable work surface. Inspect the valve for any visible signs of damage, such as cracks, worn - out seats, or bent plates. If you notice any significant damage, it may be necessary to replace the valve or its damaged components.
Step 3: Disassembly
Next, disassemble the dual plate check valve. This usually involves removing the cover or bonnet of the valve to access the internal components. Depending on the design of the valve, you may need to use additional tools, such as a screwdriver or a socket wrench, to remove the fasteners holding the cover in place.
Once the cover is removed, you can access the dual plates, the hinge pins, and the seats of the valve. Carefully remove the plates from the hinge pins. Be gentle during this process to avoid damaging the plates or the hinge pins. Inspect the plates and seats for any signs of wear, corrosion, or damage. If the plates or seats are severely damaged, they may need to be replaced.
Step 4: Cleaning the Components
Now that the valve is disassembled, it's time to clean each component thoroughly. Start by using the brush to remove any loose dirt, sediment, or debris from the surfaces of the plates, seats, and other internal components. Pay special attention to the areas around the hinge pins and the seats, as these are the areas where contaminants are most likely to accumulate.


After brushing, soak the components in the cleaning solution. Let them soak for a sufficient amount of time, usually 15 - 30 minutes, to allow the cleaning solution to break down the stubborn deposits. If necessary, you can use the brush to scrub the components gently while they are in the cleaning solution to enhance the cleaning effect.
Once the soaking time is up, remove the components from the cleaning solution and rinse them thoroughly with clean water. Make sure to remove all traces of the cleaning solution to prevent any potential chemical reactions or corrosion in the future. Use the clean cloth to dry the components completely.
Step 5: Inspection and Reassembly
After cleaning and drying the components, inspect them again for any remaining damage or contaminants. Check the smoothness of the surfaces of the plates and seats, and ensure that the hinge pins can move freely without any binding. If you find any minor scratches or rough spots, you can use fine - grit sandpaper to smooth them out.
Once you are satisfied with the inspection, it's time to reassemble the dual plate check valve. Start by installing the plates back onto the hinge pins. Make sure that the plates are properly aligned and can move freely. Then, reinstall the cover or bonnet of the valve and secure it with the fasteners. Tighten the fasteners evenly to ensure a proper seal.
Step 6: Reinstallation
After reassembling the valve, it's time to reinstall it back into the pipeline. Carefully align the valve with the flanges of the pipeline and insert the bolts or nuts. Tighten the bolts or nuts gradually and evenly in a criss - cross pattern to ensure a uniform seal. Make sure to replace the gaskets between the valve and the flanges to prevent any leaks.
Once the valve is reinstalled, perform a final inspection to ensure that everything is properly connected and tightened. You can then start the system and check for any leaks or abnormal noises. If everything seems to be in order, the cleaning process of the dual plate check valve is complete.
Other Types of Check Valves
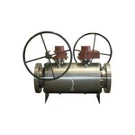
In addition to dual plate check valves, there are other types of check valves available in the market, each with its own unique features and applications. For example, the Ball Float Pattern Rubber Lined Check Valve is designed with a ball float mechanism and a rubber lining, which makes it suitable for applications where corrosion resistance is required. The Swing Type Check Valve has a disc that swings open and closed to allow or prevent the flow of fluid, and it is commonly used in large - diameter pipelines. The Damping Device check valve is equipped with a damping device to reduce the impact and noise caused by the closing of the valve, which is ideal for applications where a smooth and quiet operation is needed.
If you are interested in purchasing high - quality check valves, including dual plate check valves and other types mentioned above, please feel free to contact us for more information and to discuss your specific requirements. We are committed to providing you with the best products and services to meet your needs.
References
- "Valve Handbook: Principles and Applications" by Valmet
- "Piping and Pipeline Engineering: Design, Construction, Maintenance, and Integrity Management" by George A. Antaki
So, this is how you can clean a dual plate check valve effectively. Regular maintenance and cleaning of your check valves will not only extend their lifespan but also ensure the reliable operation of your piping systems.